Waxed Amaryllis Bulbs
These are sitting on soil, just for looks.
I’m not sure if waxing Amaryllis bulbs is a trend or not, but I happen to think they are festive, pretty amazing (because you don’t have to water them) , and a great gift idea to give to your neighbor and gardening friends.
Pre-waxed bulbs are sold online, during the winter months, from gardening stores and are fairly expensive. I can pre-wax my bulbs for much cheaper than purchasing them (50-75% less). It’s a fun process and I love working with something from nature. For me its very relaxing working with melted wax and seeing the process unfold.
I was reading other blogs online and there were mixed reviews. Before I show you how to wax your own Amaryllis bulbs, I thought I would give you the pros and cons so you can decide for yourself.

Waxed Amaryllis bulbs finished. Some have been prepared as gifts.
Here are the pros and cons of waxing your own Amaryllis bulbs:
Pros:
After they get dipped in wax, you no longer need to water them. You can give them as a gift. It’s zero maintenance as they won’t have to worry about them drying out, but still get to enjoy blooms.
Much cheaper than buying pre-waxed!
Relaxing and fun process that brings nature inside while the gardening season is dormant, during the winter months.
You can customize your bulbs to your liking. A fun creative outlet.
You can hang them upside down on a wire rack. How cool! I plan to hang mine above my kitchen sink.
Seeing a bloom come out of a waxed based with roots cut off is amazing!
Cons:
You can’t reuse and store the bulbs, as you might otherwise do with standard Amaryllis bulbs, because you cut the base of the roots off. Another minor detail, they are covered in wax!
Not cost effective IF you’re the type of personality that likes to save forced bulbs and reuse them. (See Con #1)
The blooms may not be as big and not last as long due to the nature of the growth circumstances.
Trusting that a bulb will grow in wax with roots cut off is slightly anxiety producing.
It takes patience. Waiting for the blooms, while watching the gradual development everyday in your home, can feel like forever. That’s not for everyone.

All right, now that you have weighed the Pros and Cons, here is a simple and effective explanation on waxing your own Amaryllis bulbs.
Ingredients List
Wax. I used Paraffin wax found in the baking aisle of the grocery store. It’s cheap and one box goes a long way. You can also melt candle sticks or any type of candle wax. Why is there wax in the baking aisle? Do people really wax their garbage cans or canning lids anymore. Somebody must.
A double boiler of some sort. Basically just a medium pot and a metal bowl of slightly larger diameter.
Spray Paint. You can also use acrylic paint and a painting medium specifically for acrylic paint so it will adhere to the wax while painting. The medium can usually be found at local craft stores. Spray paint is the much easier option.
Thermometer for testing the temperature of the wax. This is important.
A knife and cutting board for cutting off the base of the Amaryllis bulb.
A bowl for soaking your bulbs in water, prior to waxing.

Paraffin wax and the many uses.
Steps :
Soak the bottom half of your Amaryllis bulbs in water for 6-8 hours. I soaked mine for 6 hours. Make sure the top half to top third doesn’t get immersed. This can cause root rot and disease and ultimately death. You don’t want to create a burial site for this bulb.
After its done soaking, let it sit on a cloth for a few hours to dry a bit. Don’t let it dry out. The goal is to let it dry enough so that the wax will adhere, but still retain enough moisture inside the wax to hydrate the plant.
Get your double boiler ready. I used a stove top pot and filled it halfway with water and put a metal bowl on top. It’s very important that you melt your wax this way, not directly on the heat or your kitchen could go up in flames. Put your wax in the top of the double boiler. I would recommend a small enough bowl to allow for dipping of Amaryllis bulbs. A large bowl would require much more wax to be deep enough to dip the bulbs.
Once they have dried out a bit, slice the roots off the bottom of each bulb, nice and flat. This will allow them to stand vertical after the wax is applied. Mine sliced off like butter. It was very satisfying.
Once your wax is melted, check the temperature. The ideal temperature for dipping your bulbs is 120-150 degrees. I started dipping well above that temperature and it was a joke. Be patient and let the wax melt slowly. Once it gets to the correct temperature range the wax adheres much better and in thicker coats.
Take your amaryllis bulb and start dipping in the wax. Make sure you leave the top 1/3 of the bulb exposed and free of wax. You can also brush the wax on, but that seems more difficult and wouldn’t likely leave as smooth of a finish. Let the wax dry in between dips. You will be amazed how fast it drys. Keep dipping until it gets a thick, opaque, coating.
Paint your wax bases however you would like. Spray paint is so easy. In order to paint them with acrylic, you have to mix the acrylic paint with a candle painting medium found at your local craft store, otherwise it won’t adhere. Have fun with this part. There is no right or wrong way to decorate them. As you can see, I used metallic spray paint. My kids enjoyed being a part of this process.
That’s it! You’re done. Set them in a bright spot to bloom. 6-12 weeks.

I can’t wait to give these Amaryllis bulbs to my neighbor friends. I’m a Fanatic about gardening and flowers, so it only seems fitting to give flowers as gifts. I bet they are going to think it’s pretty cool that they don’t have to water them. The most common first remark is, “are those real?”

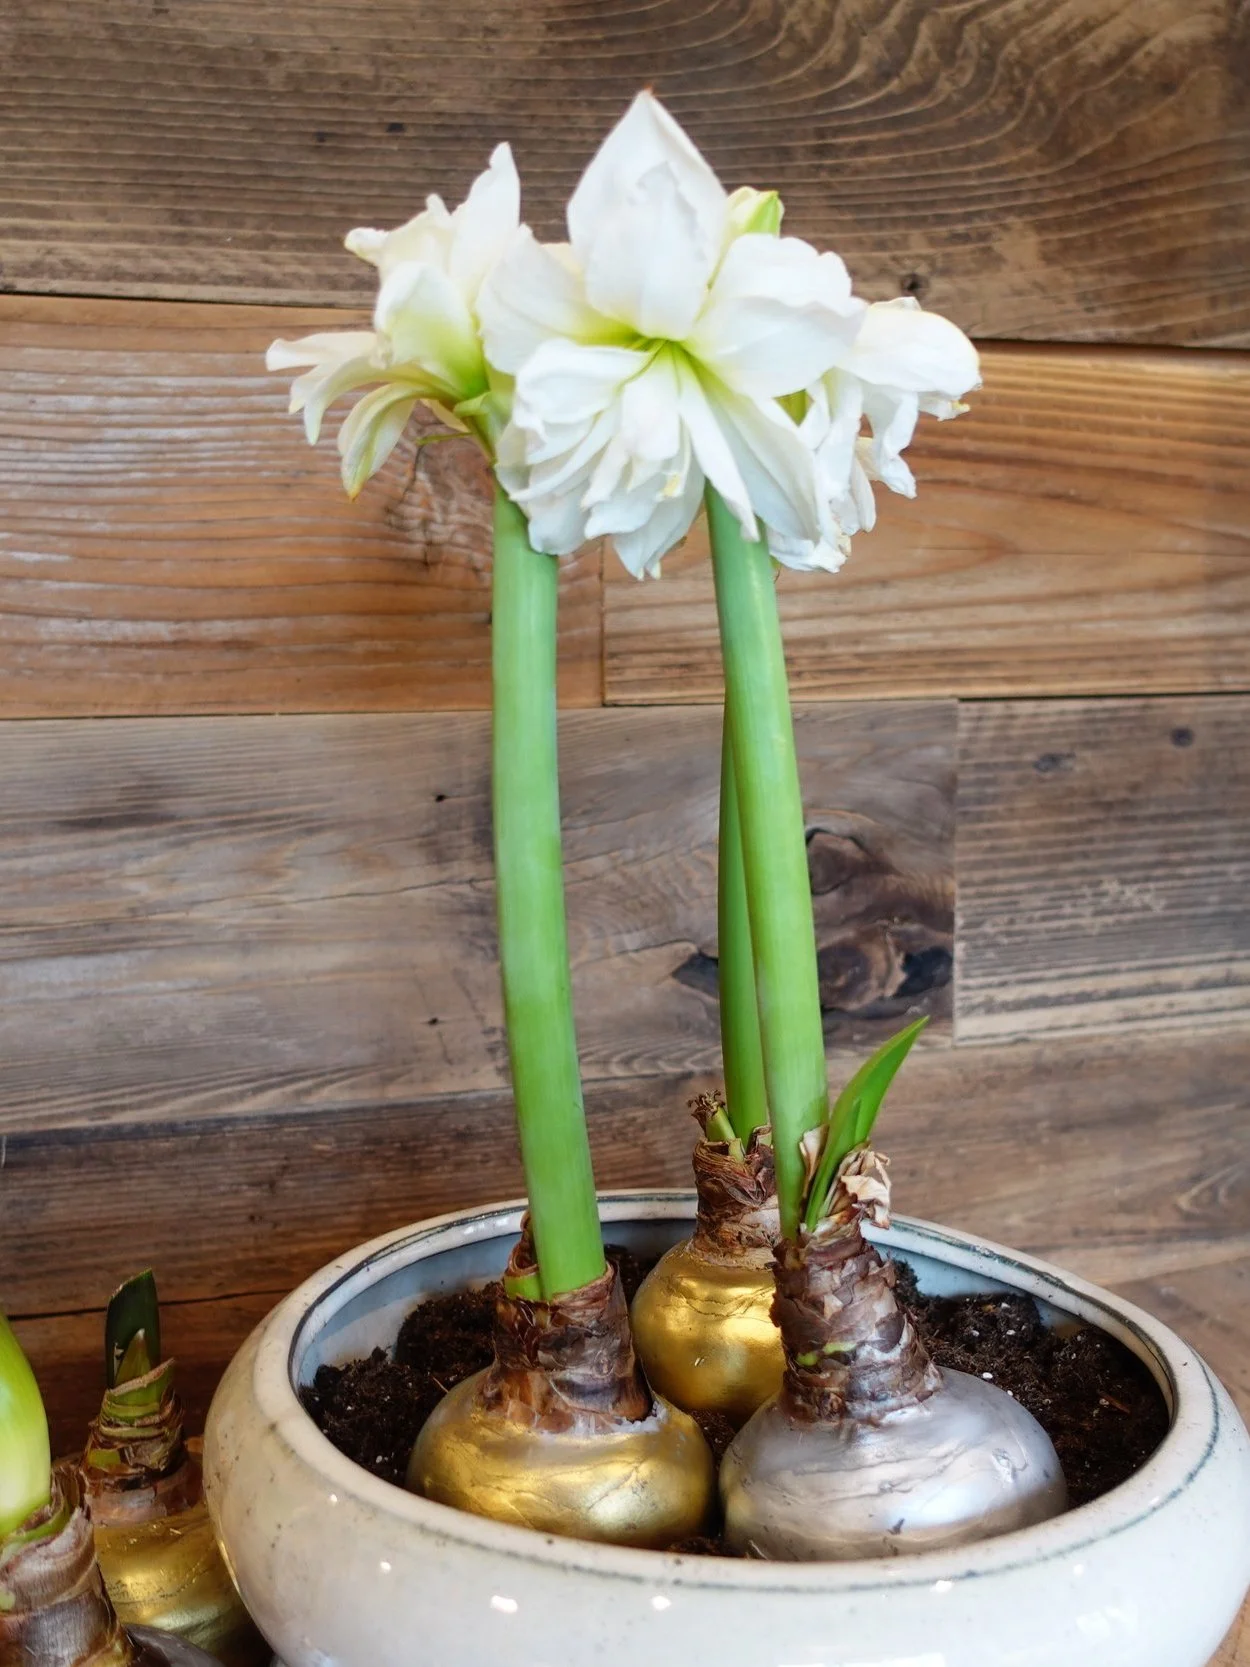
Waxed Amaryllis in bloom. So Pretty!
** UPDATE **
If you really want to extend the blooming period, then once the stem is fully grown and the flower cluster is opening, cut the stems and place them in water, do this just before the actual blooms open and it will greatly increase how long you are able to enjoy the blooms. I know this sounds crazy (you waxed them and everything), but this perks up the flowers, solves the top heavy issue and makes them last SO much longer. I tried them both ways. Check these ones out!

I know, they look fake. They are so pretty! This image is completely unfiltered.
This is definitely a fun winter activity and one that is sure to be eye catching. For more Amaryllis action, check out my Potted Amaryllis Blog Post. click HERE!
See it in action. Watch my how to video on waxing amaryllis bulbs by clicking HERE!
See the update video with Blooms by clicking HERE!
- The Flower Fanatic